Showing posts with label flower. Show all posts

Friday, March 23, 2012

Spring Flowers!

I'm back after almost a full month.  After a month in the dumps, doing my nails was the last thing I wanted to do. But today is my first day of spring break, and one of the first days of sunshine in forever (seriously- it snowed yesterday- and the day before) so I forced myself to spend some time here.  And I'm quite pleased with the results!


Products Used:
China Glaze Kinetic Candy
China Glaze Sweet Hook
China Glaze Dance baby
China Glaze Wicked Style
China Glaze Gaga for Green
China Glaze Sunshine Pop
Revlon Top Speed in Royal

As you can see, I used this as an opportunity to break out and check out my new China Glazes from the electropop collection... which I got back in January!  Yeesh.

Tuesday, January 10, 2012

Another Freehand Floral Mani!

I really loved a few of the floral manis I did previously (here and here) and I'm not opposed to tooting my own horn, so I did another!  I tried out a lovely pink color I got from a friend for Christmas.  It's really bright and gorgeous, so I went with darker grey and black for the roses.  And sprinkled in some little white accent dots and glitter for fun and variety!

Also notice my poor little nubbins? :(  I had a super turbulent flight on the way home, combined with returning to internship, wedding planning, and the Praxis II that I'm taking on Saturday.... and yowza, my nails have had it!


Here you can sort of see the glitter I slapped on there.


Products Used:
Orly Fabulous Flamingo
Sally Hansen Xtreme Wear in Wet Cement
Sally Hansen Xtreme Wear in Black Out
Sally Hansen Xtreme Wear in White On
Essie Pure Pearlfection

Hope everyone is having a fabulous beginning to their 2012!  And may you never have to take the Praxis II!

Monday, December 5, 2011

Winter Design- Red Flowers!

Inspired by the poinsettias I've been seeing around, I thought I'd try some pretty red flowers on top of the greenish-teal base of School of Hard Rocks.  I think it came out lovely!


Products Used:
Essie School of Hard Rocks
Sally Hansen Hard as Nails in In The Red Creme
Sally Hansen Chrome in Tourmaline Chrome
Love & Beauty Clear/Silver

Thursday, October 6, 2011

Floral Mani and Updates All Around

I've been absent for such a long time.  There's two reasons for that...
1. I started my internship.  It takes up SO MUCH of my time and is SO stressful, that I completely chewed off all my nails into tiny nubbins... and THEN I started working on the cuticles.  Not only that, but I've been super concerned with what is appropriate for work, and what isn't as far as nails/nail art.  And I have a confession: I wore the same mani for two weeks in a row.  And I'm using the term mani here very loosely- I slapped on two coats of a sheer polish with no base or topcoat and just called that good- for TWO WEEKS.  By the time I took it off last night, the polish was only in the very center of my nail, and my ridges had actually worn through in some places!  It was disgusting.
2. I lost my Seche Vite!!!!!! I don't know how that happened :(  But I kept saying to myself "no point in spending time on doing my nails if I can't use my SV.  I'll do my nails when I find it."  I hardly even looked!  Well last night I tore my house apart and there's no sign of it, so I just did my nails anyway, because I'd finally reached my limit.

So anyway, like I said, I finally hit my limit last night and said "enough is enough!"  Plus I had just seen this tutorial from Rebecca Like Nails, and was all over it like white on rice.  I love a good floral mani, and even though I was a little nervous to wear it to my internship, I figured go big or go home.


Ugh those cuticles.


Products Used:
Sally Hansen Xtreme Wear in Wet Cement
Maybelline Express Finish in Prompt Petals
ELF nail polish in Fuchsia
Revlon Emerald City
Sally Hansen Double Duty as topcoat
Bundle Monster Plate number BM14

Tuesday, April 12, 2011

Springtime in Matte Green and Pink

Well I tried to use both my new products, but the pink Essie did not show up well over the green, so I reverted back to my old faithful- Sally Hansen!


OPI's Gargantuan Green Grape Matte was, like most mattes in my experience, very streaky at first but dried almost instantly.  Shown in photos is about 3 layers.  I don't like the way my ridges shown through so visibly, so next time I would definitely use my ridge filler as a basecoat.  There is no topcoat used here.


Products Used:
OPI Gargantuan Green Grape Matte
Sally Hansen Insta-Dri in Flashy Fuchsia
Bundle Monster plate number BM16

Tuesday, March 22, 2011

Vintage Inspired Spring Rose Manicure

I knew that daisy french wasn't going to last very long!  Like less than 24 hours.  I decided that since I only spent 5 minutes on my nails last night, I'd spend some time attempting something I've wanted to try for a long, long time but didn't have the time or patience.

I've seen these vintage looking rose designs for a while now, but I never knew how they were done.  So I kind of just made it up as I went along, and I am so excited and proud of my results!  It's one of those things where it's been done before (and better) but I am just so happy that I was able to do it myself and have it come out mostly decent!  I am definitely going to try to take care of these for a while.


This is me not yet mastering the self-timer on my camera 
but still trying to cram all 10 fingers into one frame


Products used:
Base coat: OPI ridge filler
Base color: Sally Hansen Insta-Dri in Whirldwind White
Base color (ring finger): China Glaze- For Audrey
Roses: Sally Hansen Insta-Dri in Rapid Red and Flashy Fuschia
Leaves: Revlon Matte Suede- Emerald City
Top coat: SV

Monday, March 21, 2011

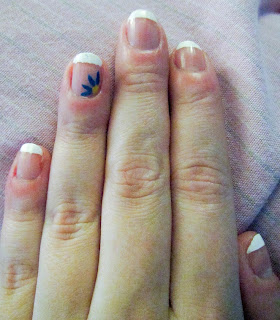
Daisy French Manicure

Well the good news is that my "interview" nails from Thursday night lasted all the way until Sunday!  That's basically a record for me.  Since they were too short to wrap the lip, they started looking a little bit worn about the ends so I preemptively removed them instead of waiting to peel them off later in the day.  I attempted a monarch butterfly wing manicure and FAILED miserably.  I didn't even attempt my right hand, and removed the whole shebang almost immediately after I completed it.

But I needed to do SOMETHING... bare nails for me are just asking to be gnawed down to nubbins.  So I went with something super quick and simple (it was like 1am, I had just gotten home from a night out at the pub with some friends from class- we were all drowning our sorrows and talking about how terribly our interviews had gone) and springy to welcome not only the first day of Spring, but my first day of Spring break.

My thumb looks WAY worse in the photo than in person.  
Don't know what's up with that!

I don't expect these to last a remarkably long time because I have tons of ideas up my sleeve and an entire week to experiment.  But I thought they were kind of cute for a five minute mani.

Abby tush


Products used:
Sally Hansen Insta-Dri in Whirlwind White
L.A. Colors Art Deco in Dark Blue
L.A. Colors Art Deco in Yellow
SV topcoat